
My cake preference is for something super chocolaty and rich. But to make a cake that is rich enough for my taste buds, I really must combine two cakes. And that is precisely what I did.
I LOVE chocolate cheesecake, and I LOVE chocolate mousse cake. So I decided to mix them together! And I didn't want to bake, so I chose two no-bake recipes and got started. I used gluten-free flour in the crust to cut down on guilt and just because I thought I'd mix it up a bit. This changed nothing on the deliciousness scale, but you can decide whether yours will be GF or not.
The end result is a delicious combination that is both rich and chocolaty. As a bonus, it can be pre-sliced and frozen, so you can pull out a piece and thaw it in the microwave for 10 to 20 seconds (or an hour just left on the counter) whenever you have a dessert craving!
Let's get to it. Here is the 'how-to' for this delicious cake...
Double Layer Chocolate Mousse Cheesecake Recipe
For the crust:
You need...
- 1/2 cup butter (set aside more for the flour-based crust)
- 1 package (or 2 to 3 cups chocolate wafer cookies, gluten-free or regular)
- 2 cups GF or unbleached all purpose flour
- 1/3 cup cocoa powder
- 1/2 cup organic cane sugar, coconut sugar, or another dry sugar alternative
Crust Instructions:
1. Cover the bottom of a springform pan with parchment paper and butter the bottom and up the inside sides. Preheat the oven to 350 degrees F.
2. Melt the butter in the microwave in a heat-proof bowl or in a saucepan on the stove.
3. Crumble your cookies (if using) and place in a medium-sized bowl or place flour, sugar, cocoa powder in a medium-sized bowl and stir to disperse ingredients. Add the melted butter to the mix and stir until mix is moist and crumbly. Add more butter as necessary.
4. Press into the bottom of an 8" or 9" springform pan, until smooth and even and covers the entire bottom.
5. Place your pan on a cookie sheet and bake in the preheated oven for just 10 minutes if using crumbled cookies, and for 15 minutes if using flour/sugar mixture crust.
6. Remove from oven and let cool in the fridge for a half an hour or until it feels cool to the touch.
For the no-bake chocolate cheesecake filling:
You need...
- 2 packages of cream cheese (2 250 gram packages), softened to room temperature (or packages fully removed and microwaved for 20 to 30 seconds on a plate or paper towel to reach room temperature)
- 2/3 cup sugar (organic raw cane sugar, or coconut sugar are fine)
- 1 cup whipping cream
- 7 ounces of semi-sweet chocolate (you can also use 70% dark chocolate, but you might want to increase the sugar by a 1/4 cup if you do)
- 1 tsp real vanilla
Cheesecake filling instructions:
1. Melt the chocolate over a double boiler or in the microwave for 1 minute on high, or 2 minutes on half power. Stir until smooth and set aside to cool slightly.
2. Whip the whipping cream in a stand mixer, or with a hand mixer, until fluffy and stiff (about 1 minute or less in a stand mixer, 5 minutes with a hand mixer). Transfer to another bowl (to free up your stand mixer bowl) and place in the fridge.
3. Place the cream cheese in your mixing bowl and beat until soft and fluffy, stopping every now and then to carefully stir in the bottom to ensure no lumps form.
4. Add the sugar and beat again until smooth (about 30 to 60 seconds), also stopping to stir in the bottom with a spatula so no lumps form. Beat for 30 seconds more.
5. Add the vanilla and beat in for 10 seconds.
6. Add the chocolate and beat in for 20 seconds or so until fully combined.
7. Gently fold in your whipping cream.
8. Pour the entire mix onto the crust ready in your springform pan. Spread around until the top is smooth and even.
9. Place the crust and bottom layer of the cake in the fridge to chill and set, while making your chocolate mousse.
For the chocolate mousse cake filling:
This recipe is modified, but originally comes from the Ghirardelli Chocolate Cookbook, Ten Speed Press, Berkeley/Toronto, 2007
You need...
- 2 cups whipping cream
- 2 cups of chocolate chips (preferably 55% to 65% dark chocolate - Ghirardelli recommends their 60% chocolate chips)
- 4 large eggs at room temperature
- 2 tablespoons granulated sugar (organic cane sugar works here)
- 1/4 cup hot brewed coffee or espresso
2. Melt the chocolate in a double boiler (careful not to let any water drops drip into it or it will turn lumpy) or in the microwave for 2 minutes on half power in a microwave-safe bowl. Stir until smooth. 3. If over a double boiler, pull off heat while about 1/8 chocolate remains in lumps, so the chocolate does not overheat. Stir until smooth.
4. Whip the eggs with the sugar at medium-high speed for about 10 minutes (less if using a Kitchenaid stand mixer), until very fluffy and thick.
5. Stir the hot coffee into the chocolate chips rapidly but until smooth, and then immediately stir it into the beaten eggs, again rapidly. Gently fold in the whipped cream.
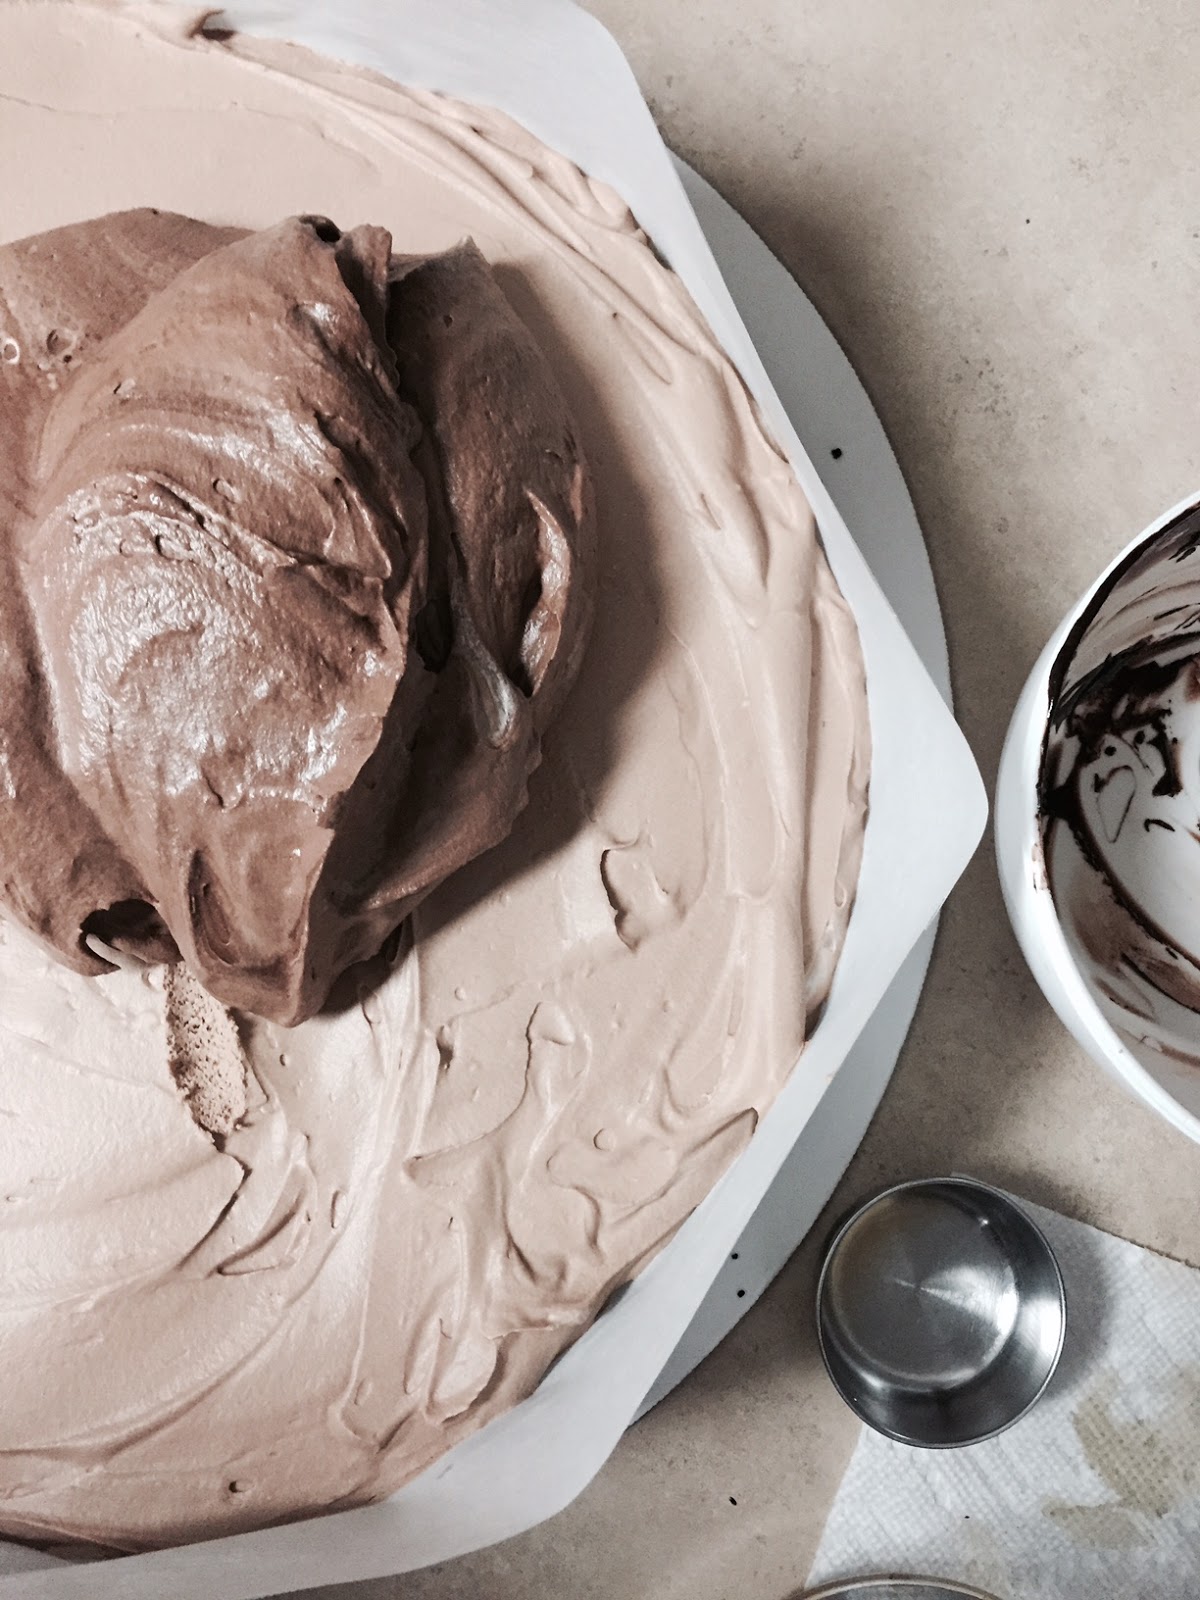
6. Pour the mixture over the cheesecake filling in the pan. Spread around until smooth.
7. Place back in the fridge and let set a least 2 hours (24 hours is good too) until ready to serve or to top the cake.
To serve the cake...
Run a knife around the inside edges of the springform pan. Remove the sides. Carefully transfer to a serving plate. Top the cake with chocolate ganache dizzled over it, chocolate shavings, cookie crumble, hazelnuts, raspberries or strawberries or whatever you prefer. Keep the cake in the fridge until ready to serve. Or seal in an airtight container (a box with a plastic bag sealed around it works too!) and freeze until ready to serve. Thaws in about an hour.
It's time to impress your friends! Although you might not want to share. :-)
thnx for sharing with us keep posting and do post on
ReplyDeleteBirth announcement Mumbai
Thank you the recipe! Will try this today itself :)
ReplyDelete"All you need is love. But a little chocolate now and then doesn't hurt."
ReplyDeletechocolate vendors mumbai
This comment has been removed by the author.
ReplyDeleteLisabeth, thank you for sharing. Great recipe.
ReplyDeleteOne question though, any suggestions for replacing eggs in chocolate mousse? My husband is allergic to eggs.
good
ReplyDeleteThank you for very usefull information.. university of alabama graduation cakes
ReplyDeleteHow to pass Nebosh IGC3
ReplyDeleteNebosh IGC Registration
IOSH MS course in Chennai
Nebosh Course in Chennai
Safety Courses in India
Chocolate is a very good one. For those who want to eat this delicious food must visit this site. Gclub
ReplyDeleteSEXY GIRL NUMBER
ReplyDeleteKOLKATA SEX
KOLKATA CALL GIRLS
CALL GIRLS IN KOLKATA
CALL GIRL IN KOLKATA
CALL GIRLS KOLKATA
KOLKATA CALL GIRLS CENTER
INDEPENDENT CALL GIRLS IN KOLKATA
KOLKATA CALL GIRLS NUMBER
CALL GIRLS NAKED PICTURE KOLKATA
KOLKATA CALL GIRLS HOME SERVICE
KOLKATA CALL GIRLS IN HOTEL ROOM PORN
KOLKATA CALL GIRLS IN NIGHT STREET
KOLKATA CALL GIRLS MOBILE NUMBER AND RATE
KOLKATA CALL GIRL NUMBER
ReplyDeleteCALL GIRL NEAR ME
KOLKATA CALL GIRLS PERSONAL CONTACT NO
KOLKATA CALL GIRLS SEX VIDEOS
KOLKATA CALL GIRLS STAND IN NIGHT
PARK STREET KOLKATA CALL GIRLS
CHEAPEST CALL GIRLS IN KOLKATA
KOLKATA ESCORTS
ESCORTS IN KOLKATA
KOLKATA ESCORTS SERVICE
ESCORTS KOLKATA
INDEPENDENT KOLKATA ESCORTS SERVICES
ReplyDeletePARK HOTEL KOLKATA ESCORTS
KOLKATA ESCORTS SEX VIDEO
KOLKATA ESCORTS HOUSEWIFE
KOLKATA ESCORTS NUDE
VIVASTREET KOLKATA ESCORTS
KOLKATA ESCORTS CALL GIRLS
KOLKATA ESCORTS RATE
CELEBRITY KOLKATA ESCORTS
RUSSIAN KOLKATA ESCORTS
KOLKATA ESCORTS WITHIN 5000
KOLKATA ESCORTS GIRL
KOLKATA ESCORTS FEMALES
FEMALE KOLKATA ESCORTS
KOLKATA ESCORTS BLOGSPOT
KOLKATA ESCORTS TUBE
SEX WITH BENGALI HOUSEWIFE IN KOLKATA ESCORTS
KOLKATA ESCORTS AMAZING CLUBIN
KOLKATA ESCORTS SEX WITH HOT I
KOLKATA ESCORTS SEX WITH HOT INDEPENDENT HOUSEWIFE CALL GIRL
KOLKATA ESCORTS GIRLS KOLKATA CALL GIRLS
KOLKATA ESCORTS CLUB
KOLKATA ESCORTS SEEX WITH HOT LNDEPENDENT HIUSEWIFE CALL GIRL
KOLKATA ESCORTS AUNTY AND GIRLS
KOLKATA ESCORTS SEX
KOLKATA ESCORTS
ESCORTS IN KOLKATA
KOLKATA ESCORTS SERVICE
KOLKATA ESCORTS SERVICES
KOLKATA INDEPENDENT ESCORTS
INDEPENDENT KOLKATA ESCORTS
ESCORTS KOLKATA
KOLKATA VIP ESCORTS
SEXY GIRL WHATSAPP NUMBER
ReplyDeleteWHO IS CALL GIRL
CALL GIRL IN KOLKATTA
BEST SEXY LADY
MASSAGE PARLOUR IN DUMDUM
PHONE NUMBER GIRL WHATSAPP
ESCORTS GIRLS INDIA
HOT WHATSAPP CONTACTS
INDIAN CALL GIRL SITE
HYDERABAD PROSTITUTES ADDRESS
SEXY GIRL NAME
CALL GIRL PHOTO COM
SONAGACHI PHOTO
PERSONAL LOCANTO KOLKATA
ESCORT GIRL MEANING IN HINDI
HOTEL FOR SEX IN KOLKATA
TOP HOTTEST MODELS
KOLKATA HOUSEWIFE SEX
FREE DATING SITE IN KOLKATA WITHOUT PAYMENT
KOLKATA GIRLS NEED SEX
CALL GIRL INDIAN PHOTO
INDIAN GIRLS CONTACT NO
KOLKATA MALE ESCORTS
WHATSAPP NUMBER REAL
SINGLE LADIES KOLKATA LOCANTO
GIRL WHATSAPP NUMBAR
WOMEN HOT PHOTOS
INDIAN GIRL PHONE NUMBER IN WHATSAPP
BOOK A GIRL FOR SEX
ESCORT SERVICES MEANING
SONAGACHI GIRLS PHOTO
HOTELS ON VIP ROAD KOLKATA
After 3 years of selling his mousses to specialty stores in NYC, Chef Johan just opened the first-ever Chocolate Mousse Bar in the US. Mousses are crafted in small batches using the finest Belgian chocolate and premium ingredients.
ReplyDeleteSee more: - https://mojodesserts.com/