Wednesday, March 30, 2016

Where to Buy Chocolate Moulds: The largest selection for chocolatiers, chocolate makers, and for home chocolate projects


Whether you say 'chocolate moulds' or 'chocolate molds' it's all the same: these are key to making a chocolatiers work look professional, clean, tidy, artistic and sometimes fun. They can be any shape, such as smooth spheres for simple ganache, simple chocolate bars, or 3D Easter bunnies and Santas for seasonal chocolate fun.

When I started in this business, I only knew of one chocolate mould supplier: Cacao Barry.  I used their moulds at a course in Montreal, and received a nice one as a gift when the class ended several days later. They are very nice and fine quality, but the selection is limited. After a while, I wanted to expand my chocolate creations, and make something different from every other chocolatier around (okay, okay, I live on a rural Island, so 'around' means two of us).

I tried to buy some other brands online, but never knew what I was going to get because the correct size was not always shown. For instance, I bought a mould that was supposed to have different shaped hearts, and what I got was a teeny-tiny silicon mould with teeny-tiny hearts, not even big enough for a bite of chocolate! That cost me $29.95, which was an absolute waste because four years later, I still haven't found a use for it.

So when Tomric Systems contacted me and told me they have over 3,300 moulds for sale online, AND they ship to Canada, I was super excited. Tomric is a company that manufactures "thermoformed polycarbonate plastic candy moulds, packaging and insert trays." Of course, they sell to some pretty large and respected chocolate companies.  But by making their moulds available for purchase online, with no need for the hassle of setting up a customer business account, the hobbyist, or the lone chocolatier like myself, can also buy moulds easily.

Perhaps you want something unique to your business? Don't worry, Tomric also can make a custom chocolate mould, with your logo or preferred design. 

For the last few months, I have been working with several of Tomric's moulds, including: an elegant Valentine's heart mould, a woodland animals mould, snowflake lollipops mould, and a gorgeous cocoa pod chocolate bar mould (see pics below). And so far, every single chocolate I have made in these moulds has turned out beautifully. I even pre-painted some of the moulds with different shades of chocolate (milk, white and dark - I'm not into using artificial colours!) and I was quite proud of myself when I saw the results.

I found the quality to be quite good. Admittedly, they were slightly less rigid than some that I have used before (i.e. Cacao Barry's), which makes it a little harder to scrape. The downside is that small amounts of chocolate are left behind which can't be scraped off. But they are certainly a huge step up from the plastic candy moulds available at Bulk Barn or other common retailers, or the wacky free ones (like the football I made in February) that I find. And when it comes to chocolate bars or simple figures, scraping is not necessary if I am careful when filling the mould cavities.

Overall, I have really enjoyed working with Tomric's chocolate moulds. I plan to order more of the ones I already have, so I can increase production. And I am considering working with Tomric to create custom moulds for some of my chocolate products.

Below is a series of pictures, with descriptions, to show you what I made from Tomric moulds. I've included Tomric's chocolate mould product codes and links to them, in case you are interested in getting some for yourself.


This mould creates super fun creatures for kids and adults alike to enjoy.
It is called the 'Woodland Creatures Mould Set', Item code: GP-114.


This is called the Cacao Pod Bar (Tomric Item Code: GP-113). 
It costs $15.95 and makes beautiful 69 gram chocolate bars
that are the perfect thin width for tasting fine chocolate.

The Cacao Pod Bar has three cavities and is easy to use.

My picture does not do this mould justice, these hearts are SO pretty and elegant!
The hearts are not thick, but still easy to fill, and they taste great
filled with truffle and meltaway! Item Code: VP-003.

This Snowflake Pop Mould Set (Item Code: CP-008) comes with three cavities for three different styled snowflakes.
It was fun to paint the mould with white chocolate accents. 
I could see - for those of you who use edible colouring - painting the
snowflakes a sparkling blue or silver. They are perfect for a Frozen Birthday Party favor!
Snowflake Pop Mould Set (Item Code: CP-008)

My finished packaged chocolate products looked great!
I was quite pleased with how my chocolate turned out in Tomric chocolate moulds.
 
If you are interested in purchasing chocolate molds from Tomric Systems, visit their website (www.tomric.com) for more information.  And if you are just starting out in the chocolate business, or expanding, Tomric also distributes European moulds and chocolate making equipment (i.e. chocolate enrobers, chocolate tempering machines, etc.) and candy making equipment.

Tuesday, March 29, 2016

Chocolate-Covered Strawberries and Chocolate Coating Recipe


Today is my birthday.  And since I've been having trouble deciding what to eat for breakfast lately (there's been a lot of time wasted staring into the cupboards, bored with my choices), I decided to be proactive yesterday and dip some juicy strawberries into dark chocolate. Why not? It's my birthday. And everyone needs a delicious birthday breakfast.

So I've decided that everyone should enjoy this on their birthday. I strongly suggest you make it for your wife, husband, kids, mom, dad and friends so they can wake up to something healthy, yet sweet.

But I know not everyone knows how to make shiny, chocolate-covered strawberries with a nice soft bite. So of course, I'm sharing the recipe! Here you go...


Chocolate Covered Strawberries Recipe:

You need:
  • About 10 ripe strawberries
  • 100 grams (3.5 oz) chocolate in white, milk OR dark chocolate, your choice!
  • 1 tbsp. coconut oil (liquid or solid, melted) or use grapeseed oil or canola oil, if no coconut oil
  • Optional for decoration: another 50 grams (1.75 oz) chocolate in opposing flavour/colour (i.e. if you are dipping your strawberries in dark chocolate, choose white or milk chocolate as your decorative chocolate).

Instructions:

1. Wash and pat the strawberries dry with a paper towel.  Let rest and dry fully for about one hour on the counter (this also brings them up to room temperature, if you had them in the fridge).

2. Place a good-sized piece of waxed paper on the counter (large enough to rest your 10 chocolate-dipped strawberries on).

3. Melt 1 tablespoon of coconut oil in a microwave-safe dish in the microwave for about 30 seconds, until liquid (not sizzling hot, just warm and melted to liquid). Set aside. If using a liquid oil, simple measure out and set aside, no need to warm it in the microwave.

4. Chop a 100 gram bar of chocolate (milk, dark or white). Place in a heat-proof, microwavable-safe bowl.

5. Microwave the chocolate for 2 minutes on half power. Stir.  Add back in microwave for 5 to 10 second intervals and stir in between until fully melted and no chunks remain (this will likely not be needed for white chocolate, whereas more time will be needed for dark chocolate).

6. Then temper the chocolate by cooling it quickly. The simplest way is to place your bowl in another dish of water with an ice cube or two, filled only to reach about half way up the outer sides of your chocolate dish, BUT BE CAREFUL NOT TO GET A SINGLE DROP OF WATER IN THE CHOCOLATE! Stir your chocolate until it cools to about 78º F for white, 80º F for milk, or 82º for dark chocolate (or slightly cooler than the temperature of the back of your (clean and dry) baby finger when dipped in). Stir and re-warm for just 3 seconds in the microwave, then stir again.  Place a small drop on the side of a table knife and let cool.  If it hardens/sets with no streaks, it is in temper. If it has white streaks, cool a little more. If you want to learn more about tempering chocolate, click here. (Psst: Tempering chocolate is also a lot easier if you have the EZtemper, worth the investment if you are going into business as a chocolatier.)

7. Add the melted coconut oil to the tempered chocolate and stir until combined.  Again place it in the ice water dish for a few seconds while stirring to cool it and temper it. Take it out of the ice-water dish and stir constantly for about 10 seconds more. Do not let it set and harden! But if it does, you can just rewarm in the microwave for 3 to 5 seconds to melt it back without throwing it out of temper.

8. Immediately begin dipping the strawberries.  Gather up the entire stem in between your fingers and dip the strawberry in the chocolate. You can dip halfway up, or all the way, it's up to you. Hold it over the bowl for a few seconds to let the excess drip off, then place the strawberry on the waxed paper to set. Do the same for all 10 strawberries.

Optional Decoration:

For an added flair, melt 1/3 of a 100 gram white or milk chocolate bar, temper it and add just 1 teaspoon of melted coconut oil (same process as above). Then place the chocolate coating in a small Ziplock snack bag, seal it and cut one tiny corner off. Through the hole in the bag, drizzle the chocolate over the strawberries (see my photo on the right for an example).


Voila! Once you master the strawberries, now you can dip anything in chocolate! Bananas, raspberries, dried fruit, pretzels, brownies, marshmallow....the list can go on and on. 

And now, I am off to dip bananas in milk chocolate! Why not? It's my birthday.

Sunday, March 20, 2016

Homemade Chocolate Easter Bunnies

 
If you saw my post in February demonstrating how to make a chocolate football using a cool plastic football container that came with a pile of NFL mini KitKats, then you know that I like to re-use where I can to make fun homemade chocolate shapes.  And it's no different for Easter.

Last year I received a bunny-shaped container of Ferrero Rochers for Easter.  I saved the plastic container that the Rochers came in, and this year I put it to use. I washed the container well,  then shined it up with a dry paper towel to remove any water drop stains, and then made giant chocolate bunnies from it. A proper bunny chocolate mould could cost anywhere between $20 and $60, and since this was a gift, it was free! And even if I were to buy the same Ferrero Rocher container today, it would still cost less than a mould. So this is a cheap and easy way to make bunnies at home.

What I also like about making homemade bunnies is: I can use organic and fair trade chocolate, or a favourite kind of chocolate (85% dark chocolate, for instance, because I have family members who prefer it - there certainly are no store-bought bunnies out there made out of super dark chocolate!).

You can make these simply at home too. Once you find a bunny container, like the Ferrero Rocher one I bought, simply follow these steps:

1. Melt and temper about 6 to 8 ounces of chocolate (two to three 100 gram chocolate bars), and then, once tempered, pour the chocolate carefully into the container. Bang it on the counter a few times to remove any bubbles, and immediately sprinkle on mini eggs, or other fun Easter treats (i.e. pastel sprinkles, marshmallow candies, jelly beans, Ferrero Rocher's cut in half, etc.).

2. Let set in the fridge for 20 minutes (not longer than 30 minutes, or humidity from your refrigerator might affect the chocolate).

3. Once set, place a flat pan or cardboard on top of the container, hold together and flip over.  Tap a little on the counter if it doesn't come out immediately.

4. Let rest until it comes back to room temperature, and then wrap in plastic wrap or in clear kitchen bags with Easter coloured bows.


Add detail by painting eyes, ear, etc. in your mould before you begin:

If you want to get a little fancier and paint a face from white chocolate, like I did, you must first melt about 50 grams of white chocolate (1.5 oz), temper it, then use a small, clean, DRY paintbrush to paint some eyes, ears, nose and a tail. Let set for just five minutes, then pour in your melted milk or dark chocolate and sprinkles, as in the steps above.

Thursday, March 17, 2016

Fudgy Chocolate Maple Truffles

The sap is running in Ontario, and it's that time of year where every edible delicacy is all about the maple syrup.

Maple is such a great sweetener. And I am always looking for ways to enjoy chocolate with sweeteners that are not cane sugar, to change things up a bit. So when I began working with 100% dark chocolate to make a ganache a few months ago, I also experimented with making a chocolate confection sweetened with maple syrup, and no cream.

I experimented with different percentages of chocolate, from 70% to 100%, but found that 100% dark chocolate was troublesome.  Sometimes I would end up with a great texture, and other times I would not. For instance, I used a Giddy Yoyo 100% dark chocolate bar, and the texture was smooth and perfect, but there was a strong floral taste. So I tried the same recipe again and used a 100% dark baking chocolate, but this turned out granular with separated cocoa butter. I tried about three other unsweetened dark chocolates, and again achieved mixed results.

My best advice, if you want to use 100% dark to ensure your truffles are only sweetened with maple syrup, is to heat the chocolate for half the recommended time, then just add back to the microwave for five seconds at a time and stir in between each heating until smooth, to be sure it doesn't burn.

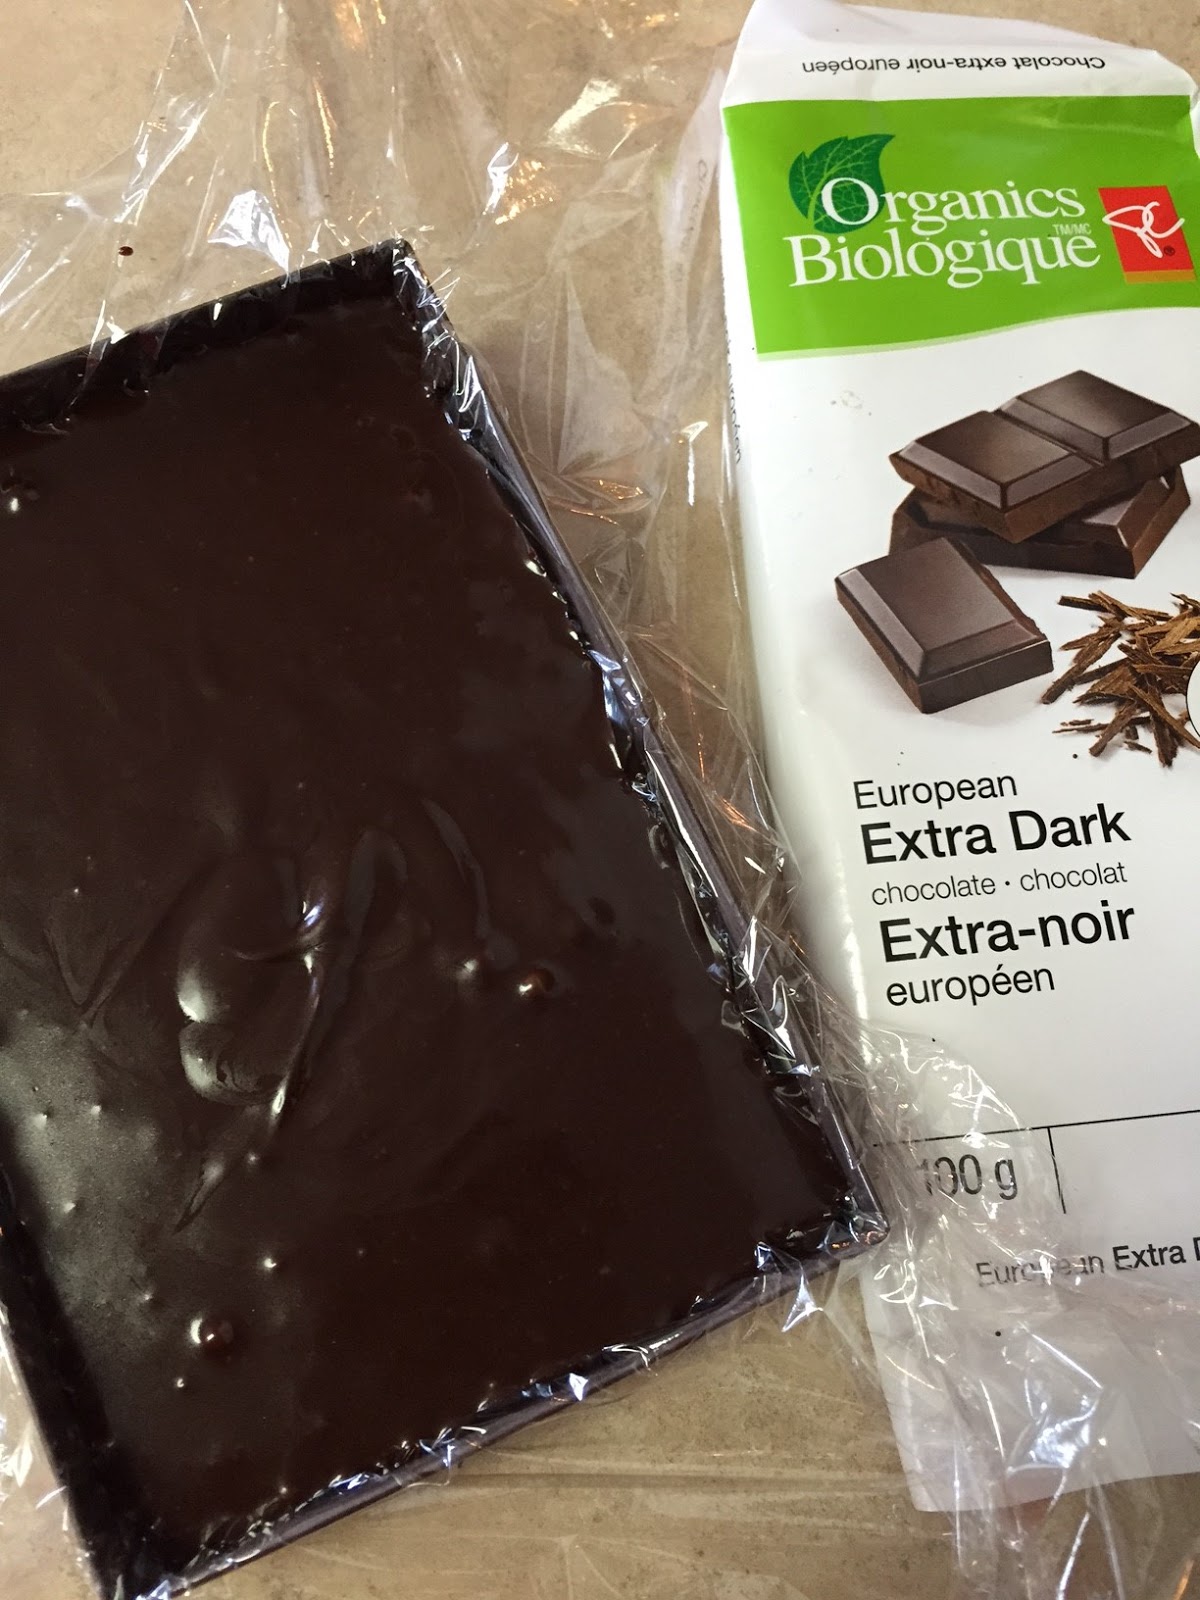
Although 70% chocolates worked best in this recipe, it was very sweet, so I finally settled on a President's Choice 85% "European Extra Dark" chocolate. With that, I achieved a smooth, lovely confection that is both bitter and sweet.


Maple Chocolate Truffles Recipe

Ingredients:
  • 1/2 cup maple syrup
  • 2 tbsp. butter, at room temperature
  • 4 oz dark chocolate (70%, 85% or 100% but be careful not to overheat it if using 100%)
  • 3 oz for coating
Tip: Buy two to three 100 gram (3.5 oz) dark chocolate bars to cover the maple chocolates and the coating (or in case you mess up and overheat your mixture - see below for what to do if this happens).

Instructions:

1. Melt in microwave for 50 seconds on half power. Stir until smooth.  If there are still lumps, add back in microwave for 5 seconds only, then stir again and continue doing this until smooth and glossy.  Add your room temperature butter (if this is cold, warm also in microwave for 5 second intervals, careful not to melt). Stir in the butter until smooth. If this won't smooth out and appears granular, see the tip below.

2. Line a small box, loaf pan, square plastic container or silicon rectangular moulds (about 3/4") with plastic wrap. Pour the chocolate mixture into the moulds. Let set at room temperature for a few hours, then cover with plastic wrap and let set overnight (or four hours in the fridge, but preferably at room temperature).

3. Once set, invert the mixture onto a piece of waxed paper. Remove the plastic wrap carefully. Slice it into square pieces, about 3/4" in size. You should get between 22 and 30 pieces.

4. Three ways to finish them:


1. Roll in cocoa powder: This is simple, fast and easy. But if you do this, do not seal the maple chocolates up right away, instead let sit out for a few hours until a slightly hard crust develops around the outside. If you place them in a container right after slicing and dusting with cocoa powder, the moisture in the outer layer will cause the cocoa powder to become wet and essentially 'disappear'. The slightly crystalized edge on these is actually quite enjoyable.

2. Dip in tempered dark chocolate:  If you have tempering and dipping skills, go ahead and finish these as you like with a thin layer of chocolate couverture. Sprinkle maple sugar on the top before your chocolate sets.

3. Dip in 'chocolate coating': Melt 3 oz of chopped dark chocolate on half power in the microwave, stir until smooth.  Then add 1 tbsp. of grape seed oil, liquid coconut oil (room temperature, not hot), or hazelnut oil. Stir well until smooth and just a few degrees above room temperature (it will harden at room temperature, and you'll need to gently melt it again). Using a fork, place the maple confection on it and dip into the coating. Gently tap off any excess and flip over onto waxed paper.  If there are holes, cover them with a dab of coating. Immediately top by lightly sprinkling maple sugar crystals, or sea salt, or chopped nuts.

Let set and enjoy!

These can be sealed and frozen. If dusted in cocoa powder, you may need to dust them again before serving, once out of the freezer.


What to do if your chocolate mixture won't become smooth? 

Chocolate separation happens when the truffle or confection mixture is overheated.  Some microwaves cook 'hot', and some glass bowls also hold heat differently and can cause your chocolate to separate (i.e. the cocoa butter separates out of the chocolate). This often won't come back together, unless you add a lot more maple syrup, which will make it soupy, or added cool butter (this may work well for you, for a more buttery truffle, but it doesn't always work). But if you can't get it to smooth out, I suggest you simply pour it into a bowl, let set as is and freeze it.  Then, whenever you need a lovely hot chocolate with no or little cane sugar, scoop out two tablespoons into a mug and add steaming hot milk. That way nothing goes to waste!

Monday, March 14, 2016

Soul Chocolate: It's All About the Roast

Soul Chocolate is one of Canada's newest bean-to-bar chocolate makers, having started up in the Toronto area in 2015. From Soul's social media accounts, we can see that the chocolate makers, Katie and Kyle, are beautiful and young, and give off a vibe of 70's-style hippy. They seem ultra cool, which shows up in their funky artistic packaging, and new-wave chocolate bar sizes that fit perfectly into  'natural' looking tasting boxes. I was a fan before I even tasted their chocolate.

Like most start-up bean to bar chocolate makers, Katie and Kyle offer just a few select chocolate bars.  They are sourcing beans from: Madagascar, Papua New Guinea and Venezuela. With Madagascar known for its citrus and fruity notes, Papua New Guinea for its smoky and fruit taste, and Venezuela for its straight-up chocolate flavour, this line-up is ideal for any chocolate origin tasting.

Upon tasting all three, I can sum up this chocolate maker's selection as a "dark roast" style of chocolate (see below for tasting notes). The heavy roast on the cocoa beans is at the forefront of each chocolate bar, setting the tone for the taste.  If you read my series on Fresco Chocolate, and how the roast level affects the flavour, you'll understand that the roast is an important consideration when making chocolate. And although a darker roast may mask some of the citrus and berry flavours in the Madagascar chocolate, I don't mind the dark roast taste at all.

The website and packaging show that Katie and Kyle appreciate the cocoa bean roasting process; in fact the website URL is soulroasters.com, and it describes their dream of "owning a beautiful barn in the country-side where they can roast cacao". Moreover, the shipping box that holds Soul's tasting bars clearly states "Roasted with love in Ontario, Canada". So before tasting the chocolate, I knew roast was important to these chocolate makers.

If you haven't heard about or had the chance to try Soul Chocolate yet, I recommend you check their website. The chocolate is now online, available in six-pack tasting sets for $30. I am looking forward to seeing how this small business progresses in the world of bean to bar chocolate. This month, we can help them progress by voting for Soul Chocolate to win grant money to expand, see here for more details.

My Soul Chocolate Tasting Notes:

Overall, the chocolate texture is smooth with only a hint of rustic edge. There is very low acidity in each chocolate bar, and a strong roast flavour.  The line-up of single origin tasting bars was well chosen by Soul - it highlights the differences in flavour between cocoa growing regions.

Soul's Madagascar 70% dark chocolate: a little less fruity than I am used to with Madagascar, although there is some citrus flavour, the strong roast flavour is the more noticeable taste.  And although mild, there is just enough berry flavour to make me think of a forkful of dense chocolate fudge cake with a thin coating of raspberry puree on top. Batch: 1217, 1 oz/28g, ingredients: cacao (77%), cane sugar (23%).

Soul's Papua New Guinea 77% dark chocolate: At first there is a fruit taste, then roast flavour takes over, and then the flavours fade off to a distinct smoke flavour. It might be fruitier than Soul's Madagascar chocolate. This chocolate is quite bold flavoured, and a little acidic (in a good way), but may benefit from a longer conche. However, I quite enjoyed the unique taste. Batch: 1217, 1 oz/28g, ingredients: cacao (70%), cane sugar (30%).

Soul's Venezuela 75% dark chocolate: Again a roast is the predominant flavour, which melts away to a chocolate pudding* or dark chocolate gelato taste*. Soul's tasting notes on the package mention hazelnut, which I tasted only slightly (and I may have been influenced by reading the tasting notes on this one). I also found it sweet and bright in a milk way.  Batch: 1217, 1 oz/28g, ingredients: cacao (75%), cane sugar (25%).

*The combination of corn starch and cocoa powder are what make a distinct pudding, commercial ice cream, or even dark chocolate gelato taste, which is why this is different than simply a 'chocolate' taste. Make and compare this no-corn starch chocolate ice cream recipe and this gelato recipe to understand the taste differences (if you don't have an ice cream maker, pour into cups and let set for several hours to make pudding, or drink them like hot chocolate, or you can make popsicles out of them!).

Overall impression and taste of Soul Chocolate: Uber cool chocolate with a great taste. Looking forward to seeing what might yet come from these chocolate makers.

Thursday, March 10, 2016

MICACAO: The next big thing in chocolate...er...tea?


Cacao tea, or cacao husk tea, as some may call it, is the newest gourmet beverage to hit the market. And I can't decide if it is the next big thing in chocolate, or the next big thing in tea.

So you might be asking, what is 'cacao tea'? The answer is immediately clear to a chocolate maker, but slightly more complex to explain for those who have no knowledge of cacao and cocoa beans. So I'll start from the beginning:

Chocolate is made from cacao or cocoa beans, which grows in a bright-colored pod on the cocoa tree in warm climates. The beans and pulp are removed from the pod, fermented for several days, then drained of the remaining pulp and dried, usually in the sun.  What is left is a bean, with a husk on it (picture the husk on a hazelnut or almond, only a little stronger, thicker and 'crunchier', so it is more difficult to remove). The beans are roasted with the husk on, then the husks are removed by hand, or the beans and husk are crushed together, then run through a winnower that essentially blows the husks off of the bean pieces to separate them.

Chocolate is made from the beans, with the husks removed. And the husks are simply discarded, only saved sometimes for use in gardens as lovely-smelling mulch.

But now, an ingenious idea has formed as a way of making use of the discarded husks: Cacao Husk Tea.

I recently had the opportunity to taste a brand of cacao husk tea called MiCacao, sent to me by company owner John Sabia. MiCacao is a start-up producer of 'South American Cacao Tea', sold online in the United States.

I first tasted it plain, with no milk, sugar or any flavours added to it, since I drink most tea like that. I found it had a strong aroma of cocoa, but the taste was very mild, and easy on the palate. Overall, it was enjoyable, and the sort of ease with which peppermint tea goes down. See below for a few different ways that I enjoyed this tea, with recipes you can try.

So why drink cacao tea over other teas? For starters, there are reported health benefits, including antioxidants, iron, magnesium and mood enhancers like Serotonin and Anandamide. According to Livingmaxwell.com, the cacao shell is high magnesium, potassium and Vitamin D, and like chocolate and cocoa, it also contains Theobromine, which is supposed to raise our serotonin levels, which "increases feelings of well being".

But since these are the husks or shells of the cacao beans, I am not sure how much they contain in comparison to chocolate. Likely significantly less than chocolate, but if that is the case, there should be less caffeine than in chocolate - a bonus for those of us trying to reduce our caffeine intake. So if you are choosing between brewed cacao beverage, such as Crio Bru, where the beans are ground without heat so they can be brewed like coffee, you might choose MiCacao tea for a similar flavour but lessened caffeine (please keep in mind that regardless, chocolate does have less caffeine than coffee).

Are there concerns with drinking cacao husk tea? I have seen in online forms that some people are concerned about cacao husk tea because of potential bacteria being left on the shells, or possible pesticides.  But pesticide use should be on the outer pod only, before the beans and husks are removed (unless perhaps if sprayed for shipping, but again they'd be in bags and crates), and since MiCacao is 100% organic, there should be no pesticides used on this brand. The beans are also roasted with the husks on, which kills bacteria. And Mr. Sabia had the product tested by a US food inspection facility, and it passed with flying colours.

How is it packaged?

MiCacao comes loose in a 0.2 lb bag, or in a bag with 12 tea bags so you can more easily travel with it or have it at work. The loose version gives you more value for your money, but there are definitely benefits to the convenience of tea bags. I would try combining a peppermint tea bag or green tea in my cup with a MiCacao bag for added flavor or health benefits.

Cacao Husk Tea Recipes:

Lisabeth's Dark Roast MiCacao:
I tried a recipe on the MiCacao website for combining it with coffee.  But I did not have 'light' coffee, since I am a dark roast kinda girl, so it took a little perfecting, but I finally made an enjoyable mix. Here is my own recipe for MiCacao and coffee:

You need:
2 tbsp.s MiCacao
1 tbsp. dark roast coffee (regular or decaf dark roast is fine)
1 tsp agave syrup, coconut syrup or sugar
1 tbsp. 1/2 & 1/2 cream (likely any cream will do)

Instructions:
Brew together the MiCacao and Coffee in a French Press, let steep for five minutes. Pour into a mug and add the cream and sweetener. Stir and enjoy!


Peppermint MiCacao:

I also enjoyed MiCacao with peppermint tea, and drank this mix on several occasions.  Here are the instructions if you'd like to try it to:

You need: 
2 tbsp. MiCacao or 1 tea bag of MiCacao
1 pure peppermint tea bag (my favourite peppermint tea is President's Choice)

Instructions for Loose Tea:
Place your two tablespoons of MiCacao in the bottom of a French press or loose tea steeper pot, then open the peppermint tea bag with scissors and add to the MicCacao. Pour in 1 cup of boiling water and let steep 5 minutes. Pour into a cup and enjoy!

Instructions for Bagged Tea:
Place one MicCacao tea bag in a cup with one peppermint tea bag. Fill with 1 cup of boiling water and let steep 5 minutes.

There are other recipes on the MiCacao website.  You can find them here.

Happy drinking!

Monday, March 7, 2016

Cocoa Couriers: Canada's First Monthly Craft Chocolate 'Club'


Cocoa Couriers is a new subscription service for fine and fair trade chocolate. It is based out of Toronto, which is exciting news for Canadian chocolate lovers!

Monthly chocolate subscriptions have become popular in the U.K. with the popular Cocoa Runners. And several have popped up recently in the U.S. as a result of the rapid emergence of American craft chocolate.  But Canada's love for bean-to-bar chocolate is starting to take hold, and Cocoa Couriers is the first of its kind in Canada.

So how does a chocolate subscription work? Subscribers can go to Cocoa Couriers website and choose a monthly subscription plan.  A starter plan for $26.99 per month will get you three unique chocolate bars, and for $30.99 to $34.99 (depending on how many months you want to sign up for), you will receive four chocolate bars from different brands. You can see below, the list of four bars that I received in February. Chocolate is shipped out after the 15th of each month, and monthly subscriptions can be cancelled at any time.

In addition to lovely packaging for your monthly set of chocolate bars, Cocoa Couriers includes a detailed description card inside the box, describing each chocolate bar. The card includes tasting notes, the bean country of origin, as well as recommended pairings (i.e. red or white wine, craft beer, coffee, hot chocolate, etc.).

This is a super fun idea for a chocolate tasting club hosted among friends. Simply add a chocolaty dessert, wine or other fun beverages, and a palate cleanser (i.e. warm water, apple slices), and you have a ready-made monthly party with your besties!

Another great thing about Cocoa Couriers is that they let you  purchase individual chocolate bars on their website. If you don't like being surprised, or want to create your own special box to suit yours or someone else's chocolate preferences, this is a great way to get your hands on chocolate bars that are not available anywhere else in Canada. For instance, Cocoa Couriers is stocking Brasstown chocolate and Vintage Plantations, two great brands that I have not been able to buy in Canada before. This is definitely exciting for Canadian chocolate lovers!

You can learn more about Cocoa Couriers on the website at: https://cocoacouriers.com/.


Here is an overview of the chocolate bars that I received in the Cocoa Couriers box in the end of February:


Black-Fig by Dick Taylor, 72% Madagascar Origin Dark Chocolate, 2 oz (57g)

This California chocolate maker never stops amazing me with its chocolate. Not only is the packaging a work of art, but the bars themselves are beautiful and the taste is always spot on.  My friends and I were unsure if we'd like the taste of the 'black figs' sprinkled on the chocolate, but the combination was just right and won us over immediately. For more info on this bar, visit Dick Taylor's website here.


Toasted Coconut by Medecasse Madagascar Chocolate, 70% Madagascar Dark Chocolate 2.64 oz (75g)

At first taste, the group was unsure about this chocolate.  It seemed bitter and a wee bit gritty.  But when everyone came back around to it, after tasting the others, we all thought it was different and tastier. I found it grew on me by the third tasting. The toasted coconut was very pleasant. If you have ever toasted some shredded coconut at home, you'll know why it is a nice addition.  It softens the coconut, makes it a bit sweeter, and it is very difficult to toast without burning.

90% of Madecasse's chocolate has been made in Madagascar, with some made in the United States. For more information on Madecasse's chocolate, visit: www.medecasse.com.


Raaka Virgin Chocolate, Mint & Nibs, 56% Cacao, Dem. Rep. Congo, 1.8 oz

I normally prefer my chocolate darker than 56%, but this one was quite delicious, and the sweetness paired very well with the mint chocolate.  The nibs offered me a light punch of bitter cacao, and all the antioxidants I need. Truly a great tasting chocolate bar by one of my favourite raw chocolate makers.


Blueberry 70% Dark Chocolate by Brasstown Fine Artisan Chocolate, Ecuador Manabí, 2.25 oz (63.87g)

I didn't think I liked blueberries in dark chocolate until I tasted this chocolate bar.  And I may be fully converted now. These berries were plump, moist and not teeny-tiny chewy things with fake flavour, like we might see in more commercial chocolate bars.  The berry flavour was quite subtle, actually, and their mild taste paired beautifully with the 75% dark chocolate.

There were sections that didn't have blueberries. So there was one comment in our tasting group that there should be a blueberry in every piece.  True.  But having added inclusions to chocolate bars myself, I know that's its difficult thing to get an even spread of the berries - you definitely don't want to play around with the blueberries to much once they are poured in the mould or the chocolate will set as you do.  This can be solved by sprinkling them on the back, but I truly liked that the berries were within Brasstown's chocolate and fully enrobed by it.

Also, by getting pieces of chocolate with no blueberries, I could truly taste and enjoy this Ecuadorian origin chocolate. It was shiny, it had a lovely snap, and a nice roast flavour and straight up cocoa taste, with a pleasant bitterness level. There was a slight berry flavour in the chocolate, which may have simply been the influence of the stirred-in blueberries.

It took three tastings to decide that I love this chocolate bar. Not just because of the taste, but also because it opened my eyes.  I have avoided solid chocolate bars with blueberries in it for a long time, not willing to taste them.  This chocolate made me realize that I should be more open in future, and willing to taste beyond the plain, solid chocolate bar.

***
I really enjoyed my Cocoa Couriers box of chocolate! And I'd like to thank owner Joe Grande for sending it to me! I've already put in an order for my next batch of chocolate from Cocoa Couriers.